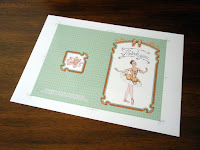
Print with "reduction-print mode" so that cut marks are don't out of paper. Reference image size is 210×297mm(8.27inch×11.69inch).
Before cut out card, crease center line with died ballpoint pen. Place a ruler to central cut marks.
3. 写真のように表面からでもいいですが、より丁寧に仕上げるなら、上下の縦トンボにカッターで切れ目を入れ、それを印に裏面からなぞります。This image picture is making crease by front side, but if you want to make much better, try it from back side. Nick on "both length cut marks" as mark, and make crease by back side.
4. トンボに定規を合わせます。※2020年10月以降に制作したカードはトンボの形が左写真と違います。
Place a ruler to cut-marks. ※After October2020, mark type changed from left image picture.
5. 拡大画像です。2本ある線の、内側のラインに合わせましょう。Like this is extended image, place ruler on inside line. Cut with cutter knife with few times. You should use cutting mat so as not hurt desk. Don't place hands the way of cut line. or you will hurt your hands.
6. カッターで数回に分けて切ります。カッターマットなどを敷いて、机を傷つけないようにしましょう。刃の進路に手を置かないでね。紙の端まで全て切らないで画像のあたりでストップ。
Like this image, don't cut all. Stop cutting before end of paper.
7. 他の3辺も同様に切ったら終了!丁寧に半分に折りましょう。
Cut other 3 sides too. And fold in half.
8. 中にメッセージを書いて、封筒に入れて家族やお友達に届けて下さい。カード裏面のURLを見て、このブログに来てくれる人が増えると嬉しいです!
Write message inside and let's send it to your friends, families! I'm verrrrrry happy if she will come my blog from back side URL....!


No comments:
Post a Comment